How to Upgrade Your Vendo
Things that you need:
Step 1:
Download and install CH340 Driver, this is needed so your computer can detect the Nodecmu/Vendo.
Step 2:
Export NodeMCU Flasher from the ZIP file. Then Run/Open NodeMCU-PyFlasher.exe
Step 3:
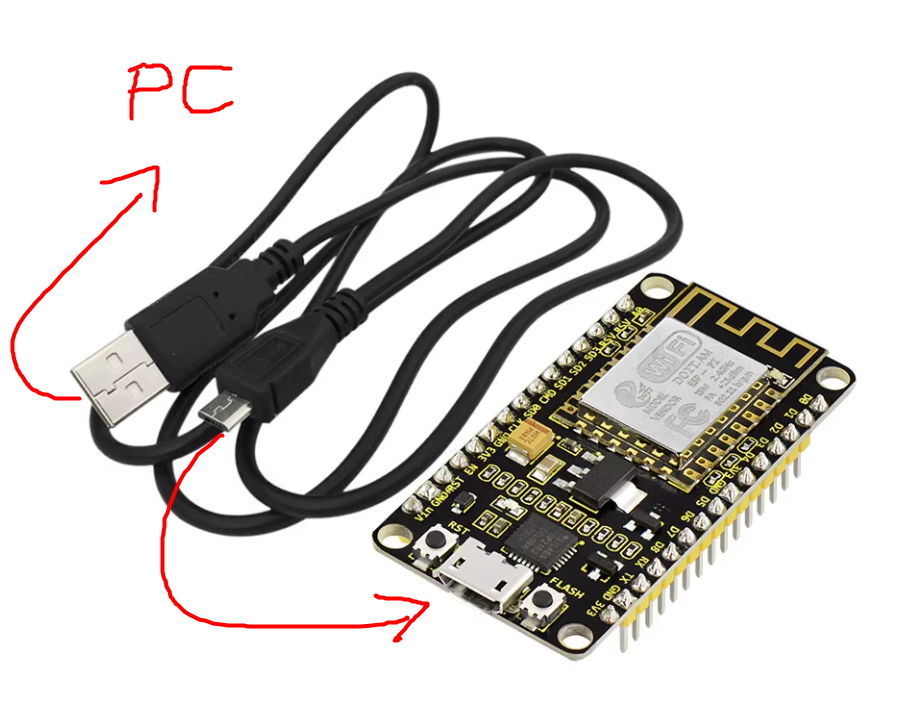
Insert the Micro USB Data Cable to NodeMCU and connect it to your computer.
Note: No need to remove the wirings of your vendo
Step 4:
In the NodeMCU Flasher, your computer should be able to detect the Port where you inserted your Nodemcu. Select the serial port that was detected.
Select NodeMCU Firmware (VendoHybrid-Wireless-Wired.12.8.25.bin).
Choose 9600 Baud rate, and then proceed with Flashing your Nodemcu. Wait until it’s finished.

Step 5:
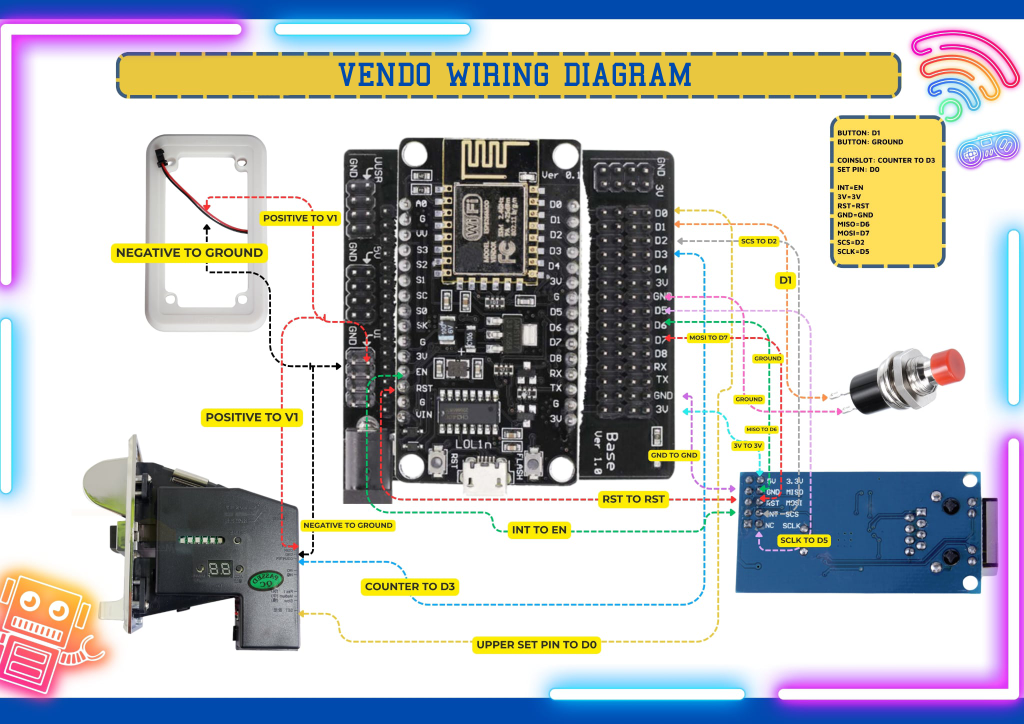
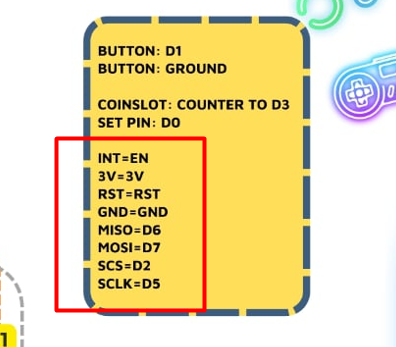
After flashing the new vendo firmware, rewiring is required to accommodate LAN Module. The LAN module is not required if you’re not switching to LAN setup but rewiring is still required. Please follow below updated wiring diagram.
If keeping your setup with wireless connectivity, you’ll only need to move Coinslot Counter (D5) to D3, Coinslot Set Pin (D7) to D0 and Button (D4) to D1. The button is still needed for vendo setup but it’s not anymore needed for customers to start inserting coins.
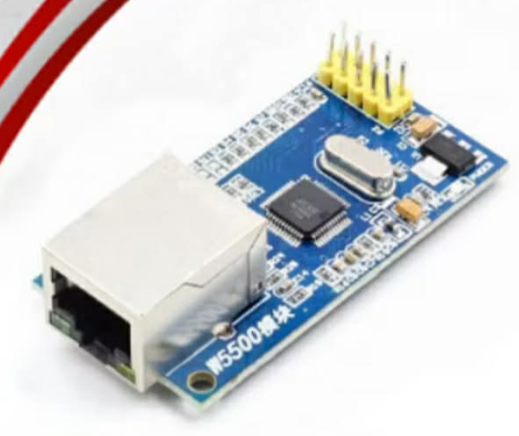
For Wired Setup, you’ll need Lan Module: https://s.shopee.ph/1VryDGxfHs
You’ll also need additional Dupont Wires (FEMALE TO FEMALE): https://s.shopee.ph/AKTMjjgixj

Please follow below wiring connection for the LAN Module.
After all the wirings are properly connected, the Vendo should be good to go. No need to reset the vendo or update the connection or settings.
Once the Vendo is already connected to the Internet, you should be able to remotely update it’s connection through your account dashboard.
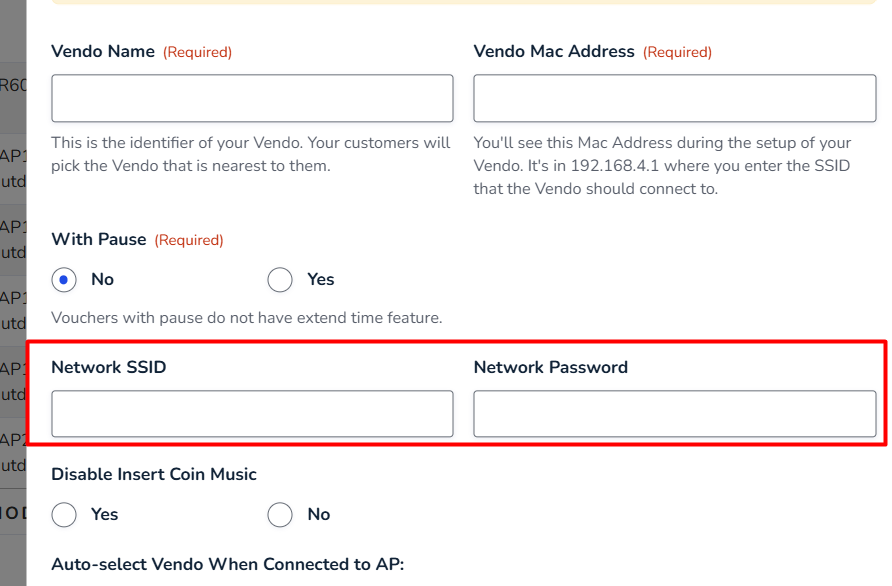
The Network SSID and Network password in the add/edit Vendo popup will be used for the wireless setup.