How to Upgrade Your PIO WiFi Vendo
Things that you need:
Step 1:
Download and install CH340 Driver, this is needed so your computer can detect the Nodecmu/Vendo.
Step 2:
Export NodeMCU Flasher from the ZIP file. Then Run/Open NodeMCU-PyFlasher.exe
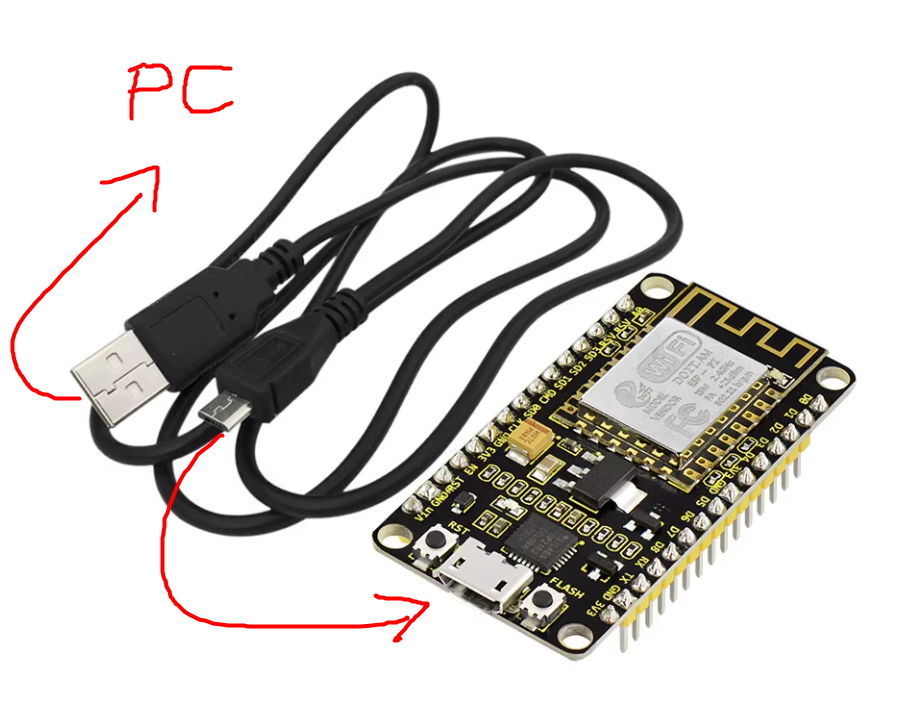
Step 3:
Insert the Micro USB Data Cable to NodeMCU and connect it to your computer.
Note: No need to remove the wirings of your vendo
Step 4:
In the NodeMCU Flasher, your computer should be able to detect the Port where you inserted your Nodemcu. Select the serial port that was detected.
Select NodeMCU Firmware (WiFiVendo.v3.11.25.ino).
Choose 9600 Baud rate, and then proceed with Flashing your Nodemcu. Wait until it’s finished and we’re all done. No need to reset up the vendo.

Once your Vendo is already upgraded, the processing of entering setup mode will be changed. Just push and hold the button for 15 seconds right after the Vendo is turned on.
After 15 seconds, check for the SSID: PIO WiFi Vendo. Connect the PIO WiFi Vendo and open your browser then enter 192.168.4.1